
Yes, it’s actually possible, and today I’ll show you how.
First things first, your computer needs to have UEFI enabled, as there aren’t any good tricks for BIOS (that I am aware of)
And before you say so, yes, I was a Legacy BIOS user for ~5 years, but in those 5 years, I haven’t found anythin’ other than Unetbootin, but today we are not gonna talk about that.
There are a couple of methods to boot from install media without a USB, but today I’m gonna give you the most simple method I could find. Scared of rEFInd? No problem!
First of all, get your installation ISO up and ready, Linux and Windows, or any OS that has the EFI files structured within efi\boot by default will work.
Go ahead to Disk Management (diskmgmt.msc) and shrink any basic data partition to the size of your installation ISO (for example, if your ISO is 4.7GB, make the partition 4.7GB), in my case, since I will use Kubuntu 24.04 LTS, I will make the partition 4.4GB, just in case.
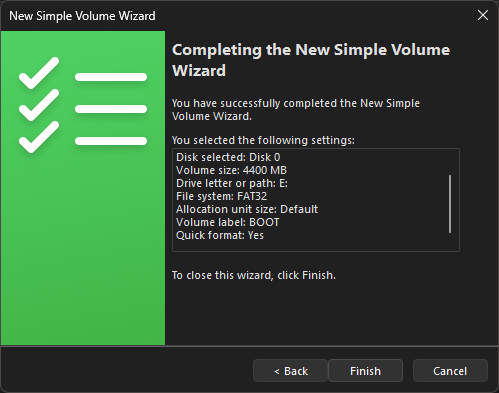
You should now have a 4.4GB FAT32 partition, now get your ISO, open it via any file archiving utility like 7-Zip or mount it via Windows’ Image Burner (if you’re on Windows 10 or 11).
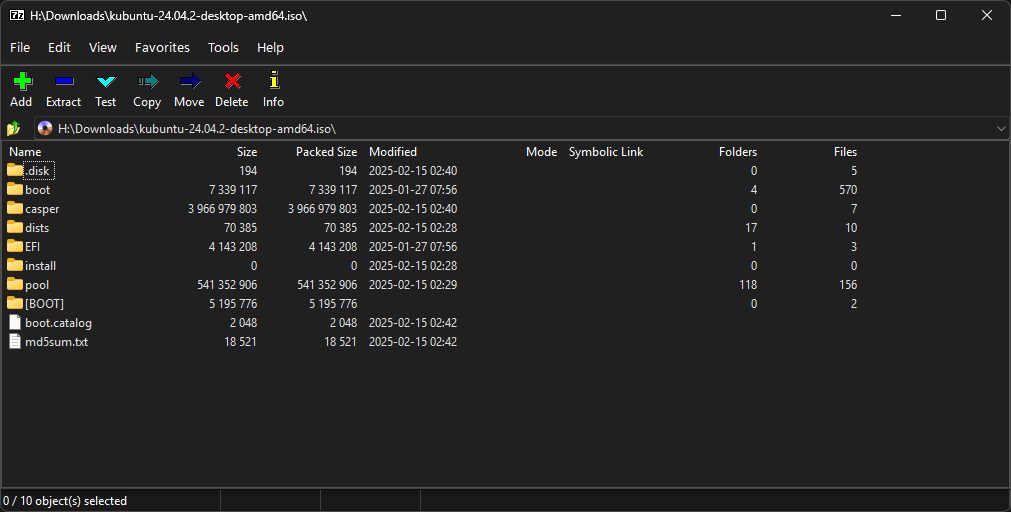
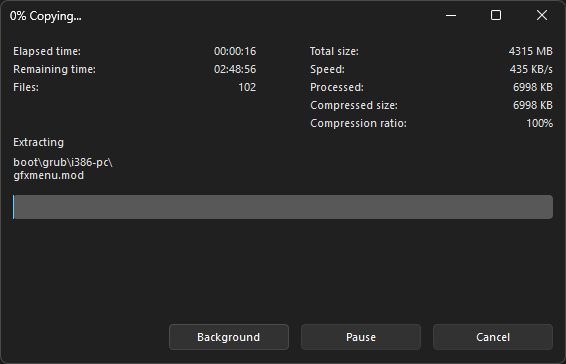
With the files opened in the file explorer, copy them to the root of the FAT32 partition.
With 7-Zip, the dialog should look like this
….Then you’re all set! Next up reboot your computer and press F12 (or the boot menu keybind the POST screen should tell you), if done correctly, it should show the model of your hard drive, then the partition number (FYI the Windows partition is shown as Windows Boot Manager).
Most firmwares should directly boot from it, due to the presence of a .efi file on efi\boot, which will be detected as a bootable entry.
Now continue your installation procedure as usual, you’re all good to go!
If you want to try this on virtualizators like VMware, you’re out of luck, its boot menu doesn’t seem to show the partition, and it defaults to Windows Boot Manager (or any boot manager installed). If no OS is installed yet the partition is present, it will time out and try to boot from the network. I’m not so sure if the EFI shell will help with it, but if you manage to get it working, I’ll be sure to edit this post.
I’ve yet not tested on other computer with UEFI firmware, so I am not sure if it works on ALL UEFI hardware, if it doesn’t work, don’t blame me, blame your PC manufacterer.
Well now I’m gonna go, Horibyte signing off.
Yes, it’s actually possible, and today I’ll show you how.
First things first, your computer needs to have UEFI enabled, as there aren’t any good tricks for BIOS (that I am aware of)
And before you say so, yes, I was a Legacy BIOS user for ~5 years, but in those 5 years, I haven’t found anythin’ other than Unetbootin, but today we are not gonna talk about that.
There are a couple of methods to boot from install media without a USB, but today I’m gonna give you the most simple method I could find. Scared of rEFInd? No problem!
First of all, get your installation ISO up and ready, Linux and Windows, or any OS that has the EFI files structured within efi\boot by default will work.
Go ahead to Disk Management (diskmgmt.msc) and shrink any basic data partition to the size of your installation ISO (for example, if your ISO is 4.7GB, make the partition 4.7GB), in my case, since I will use Kubuntu 24.04 LTS, I will make the partition 4.4GB, just in case.
You should now have a 4.4GB FAT32 partition, now get your ISO, open it via any file archiving utility like 7-Zip or mount it via Windows’ Image Burner (if you’re on Windows 10 or 11).
With the files opened in the file explorer, copy them to the root of the FAT32 partition.
With 7-Zip, the dialog should look like this
….Then you’re all set! Next up reboot your computer and press F12 (or the boot menu keybind the POST screen should tell you), if done correctly, it should show the model of your hard drive, then the partition number (FYI the Windows partition is shown as Windows Boot Manager).
Most firmwares should directly boot from it, due to the presence of a .efi file on efi\boot, which will be detected as a bootable entry.
Now continue your installation procedure as usual, you’re all good to go!
If you want to try this on virtualizators like VMware, you’re out of luck, its boot menu doesn’t seem to show the partition, and it defaults to Windows Boot Manager (or any boot manager installed). If no OS is installed yet the partition is present, it will time out and try to boot from the network. I’m not so sure if the EFI shell will help with it, but if you manage to get it working, I’ll be sure to edit this post.
I’ve yet not tested on other computer with UEFI firmware, so I am not sure if it works on ALL UEFI hardware, if it doesn’t work, don’t blame me, blame your PC manufacterer.
Well now I’m gonna go, Horibyte signing off.